


* 겪고 있는 문제 상황을 최대한 자세하게 작성해주세요.
* 문제 해결을 위해 어떤 시도를 해보았는지 구체적으로 함께 알려주세요.
첫번째, 두번째 사진이 안나오는 거 제외하곤 해결했는데
뭐가 문제일까요?
보고 계신 화면 전체
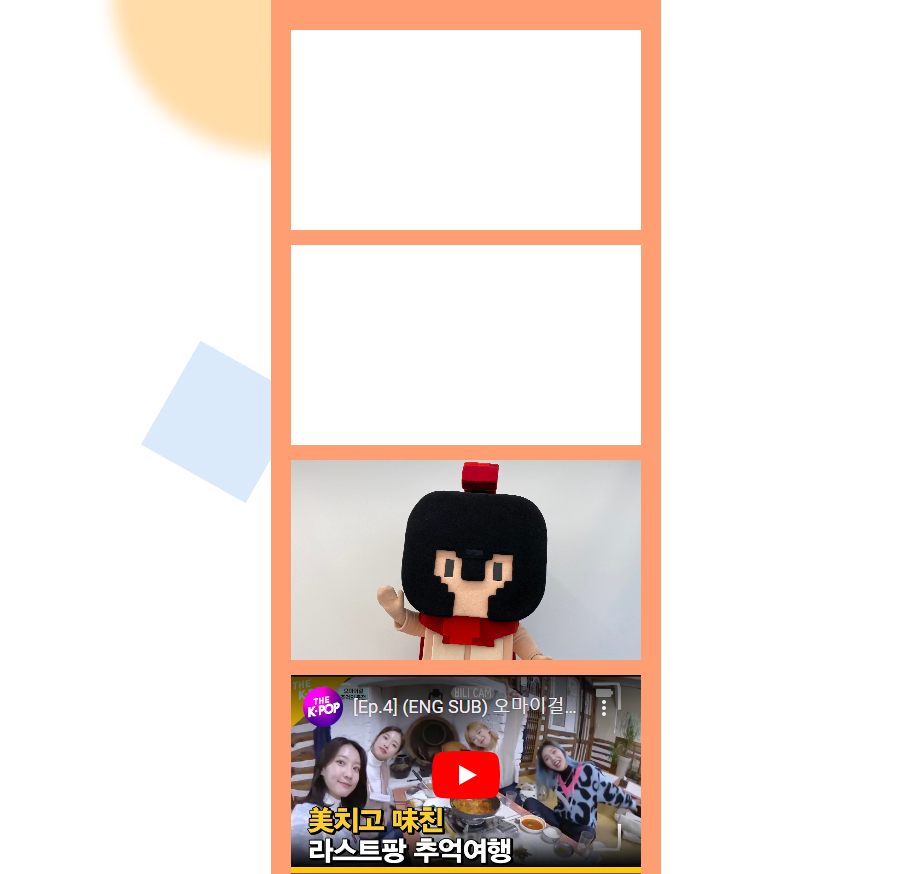
를 캡처해 주시면, 튜터님들이 빠르게 상황을 이해할 수 있어요.
<!DOCTYPE html>
<html lang="en">
<head>
<meta charset="UTF-8" />
<meta http-equiv="X-UA-Compatible" content="IE=edge" />
<meta name="viewport" content="width=device-width, initial-scale=1.0" />
<title>코딩네컷</title>
<style>
/* 이서윤체 폰트 적용을 위한 코드 */
@font-face {
font-family: "LeeSeoyun";
src: url("https://cdn.jsdelivr.net/gh/projectnoonnu/noonfonts_2202-2@1.0/LeeSeoyun.woff") format("woff");
font-weight: normal;
font-style: normal;
}
/* body태그 자체에 css 요소 부여 */
body {
font-family: "LeeSeoyun";
margin: 0;
display: flex;
justify-content: center;
background-image: url("./background.png");
}
/* */
.container {
width: 390px;
background-color: #ff9d73;
height: 100%;
}
.photos {
margin-top: 30px;
}
.photo-frame {
background-color: white;
margin: 15px 20px;
height: 200px;
background-size: cover;
position: relative;
cursor: pointer;
}
/* 하단 영역 스타일링 */
.footer {
display: flex;
flex-direction: column;
align-items: center;
}
.f-title {
font-size: 25px;
font-weight: 900;
color: white;
}
.f-date {
font-size: 15px;
font-weight: 500;
color: white;
}
#image1 {
background-image: url("./img1.jpeg");
}
#image2 {
background-image: url("./img2.jpeg");
}
#image3 {
background-image: url("./img3.png");
}
#image4 {
background-image: url("./img4.jpeg");
}
.photo-description {
color: white;
background-color: black;
width: fit-content;
padding: 0 20px;
margin-bottom: 10px;
border-radius: 10px;
position: absolute;
bottom: 0;
transform: translate(-50%);
left: 50%;
opacity: 0;
}
.video {
width: 100%;
height: 100%;
}
/* opacity : 투명도를 의미해요! 0% 투명하다. 즉 다 보인다. */
.showText {
opacity: 0;
}
/* opacity : 투명도를 의미해요! 100% 투명하다. 즉 안보인다. */
/* transition : 나타날 때 0.5초동안 천천히 나타나는 효과를 주라는 의미에요 */
.hideText {
opacity: 1;
transition: opacity 0.5s linear;
}
</style>
<script>
// 텍스트가 보여지는 기능
// 1. 몇 번째 사진에 마우스가 올라갔는지 확인(if문)
// 2. 해당 사진을 찾아 hideText class를 지워주고, showText는 삽입해줌
function showText(number) {
if (number === 1) {
document.querySelector("#desc1").classList.remove("hideText");
document.querySelector("#desc1").classList.add("showText");
} else if (number === 2) {
document.querySelector("#desc2").classList.remove("hideText");
document.querySelector("#desc2").classList.add("showText");
} else {
document.querySelector("#desc3").classList.remove("hideText");
document.querySelector("#desc3").classList.add("showText");
}
}
// 텍스트가 감춰지는 기능
// 1. 몇 번째 사진에서 마우스가 벗어났는지 확인(if문)
// 2. 해당 사진을 찾아 shotText class를 지워주고, hideText는 삽입해줌
function hideText(number) {
if (number === 1) {
document.querySelector("#desc1").classList.remove("showText");
document.querySelector("#desc1").classList.add("hideText");
} else if (number === 2) {
document.querySelector("#desc2").classList.remove("showText");
document.querySelector("#desc2").classList.add("hideText");
} else {
document.querySelector("#desc3").classList.remove("showText");
document.querySelector("#desc3").classList.add("hideText");
}
}
// 클릭 기능
// 1. 선택된 사진의 숫자를 가진 텍스트를 alert 형태로 출력해줌
function alertText(number) {
alert(`${number}번째 추억이에요! 눌러주셔서 감사합니다 :)`);
}
</script>
</head>
<body>
<div class="container">
<div class="photos">
<div id="image1" class="photo-frame" onmouseover="hideText(1)" onmouseout="showText(1)"
onclick="alertText(1)">
<span id="desc1" class="photo-description">
첫 번째 이미지 설명
</span>
</div>
<div id="image2" class="photo-frame" onmouseover="hideText(2)" onmouseout="showText(2)"
onclick="alertText(2)">
<span id="desc2" class="photo-description">
두 번째 이미지 설명
</span>
</div>
<div id="image3" class="photo-frame" onmouseover="hideText(3)" onmouseout="showText(3)"
onclick="alertText(3)">
<span id="desc3" class="photo-description">
세 번째 이미지 설명
</span>
</div>
<div class="photo-frame">
<iframe src="https://www.youtube.com/embed/agYZbSt-3LY" frameborder="0" class="video"></iframe>
</div>
</div>
<div class="footer">
<p class="f-title">Happy Lunch Time</p>
<p class="f-date">2023.01.23</p>
</div>
</div>
</body>
</html>


