커뮤니티

포인트
쿠폰
내 강의실
국비 신청 내역
증명서
계정
로그아웃
학습 질문
개발 일지
나의 활동
답변 완료
숙제를 진행하다가...
[왕초보] 나만의 수익성 앱, 앱개발 종합반 v5
3주차


김*환
댓글
7
・
추천
0
・
조회수
27
조회수
27
답변 완료
* 겪고 있는 문제 상황을 최대한 자세하게 작성해주세요.
* 문제 해결을 위해 어떤 시도를 해보았는지 구체적으로 함께 알려주세요.
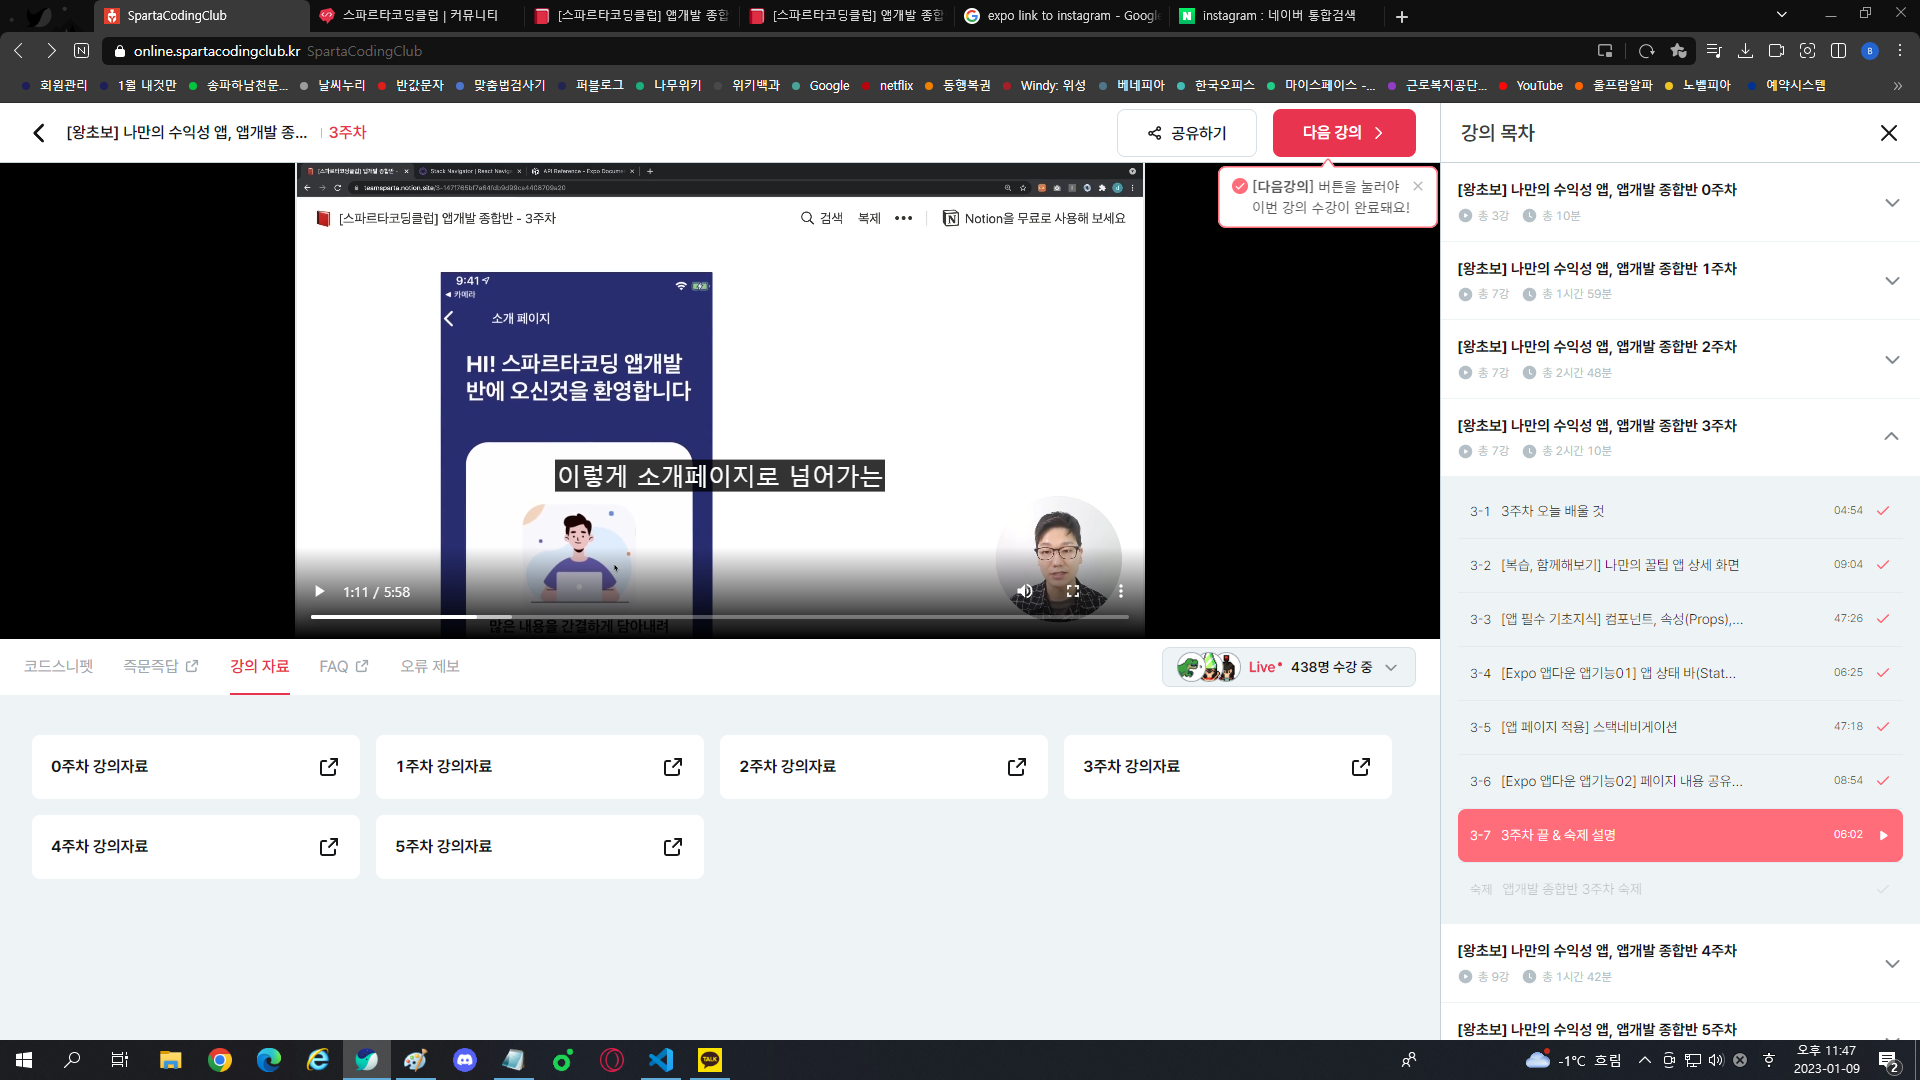
AboutPage를 거의 완성시켰는데요.
네비게이터 헤더 부분의 타이틀과 컬러를 바꾸기 위해서
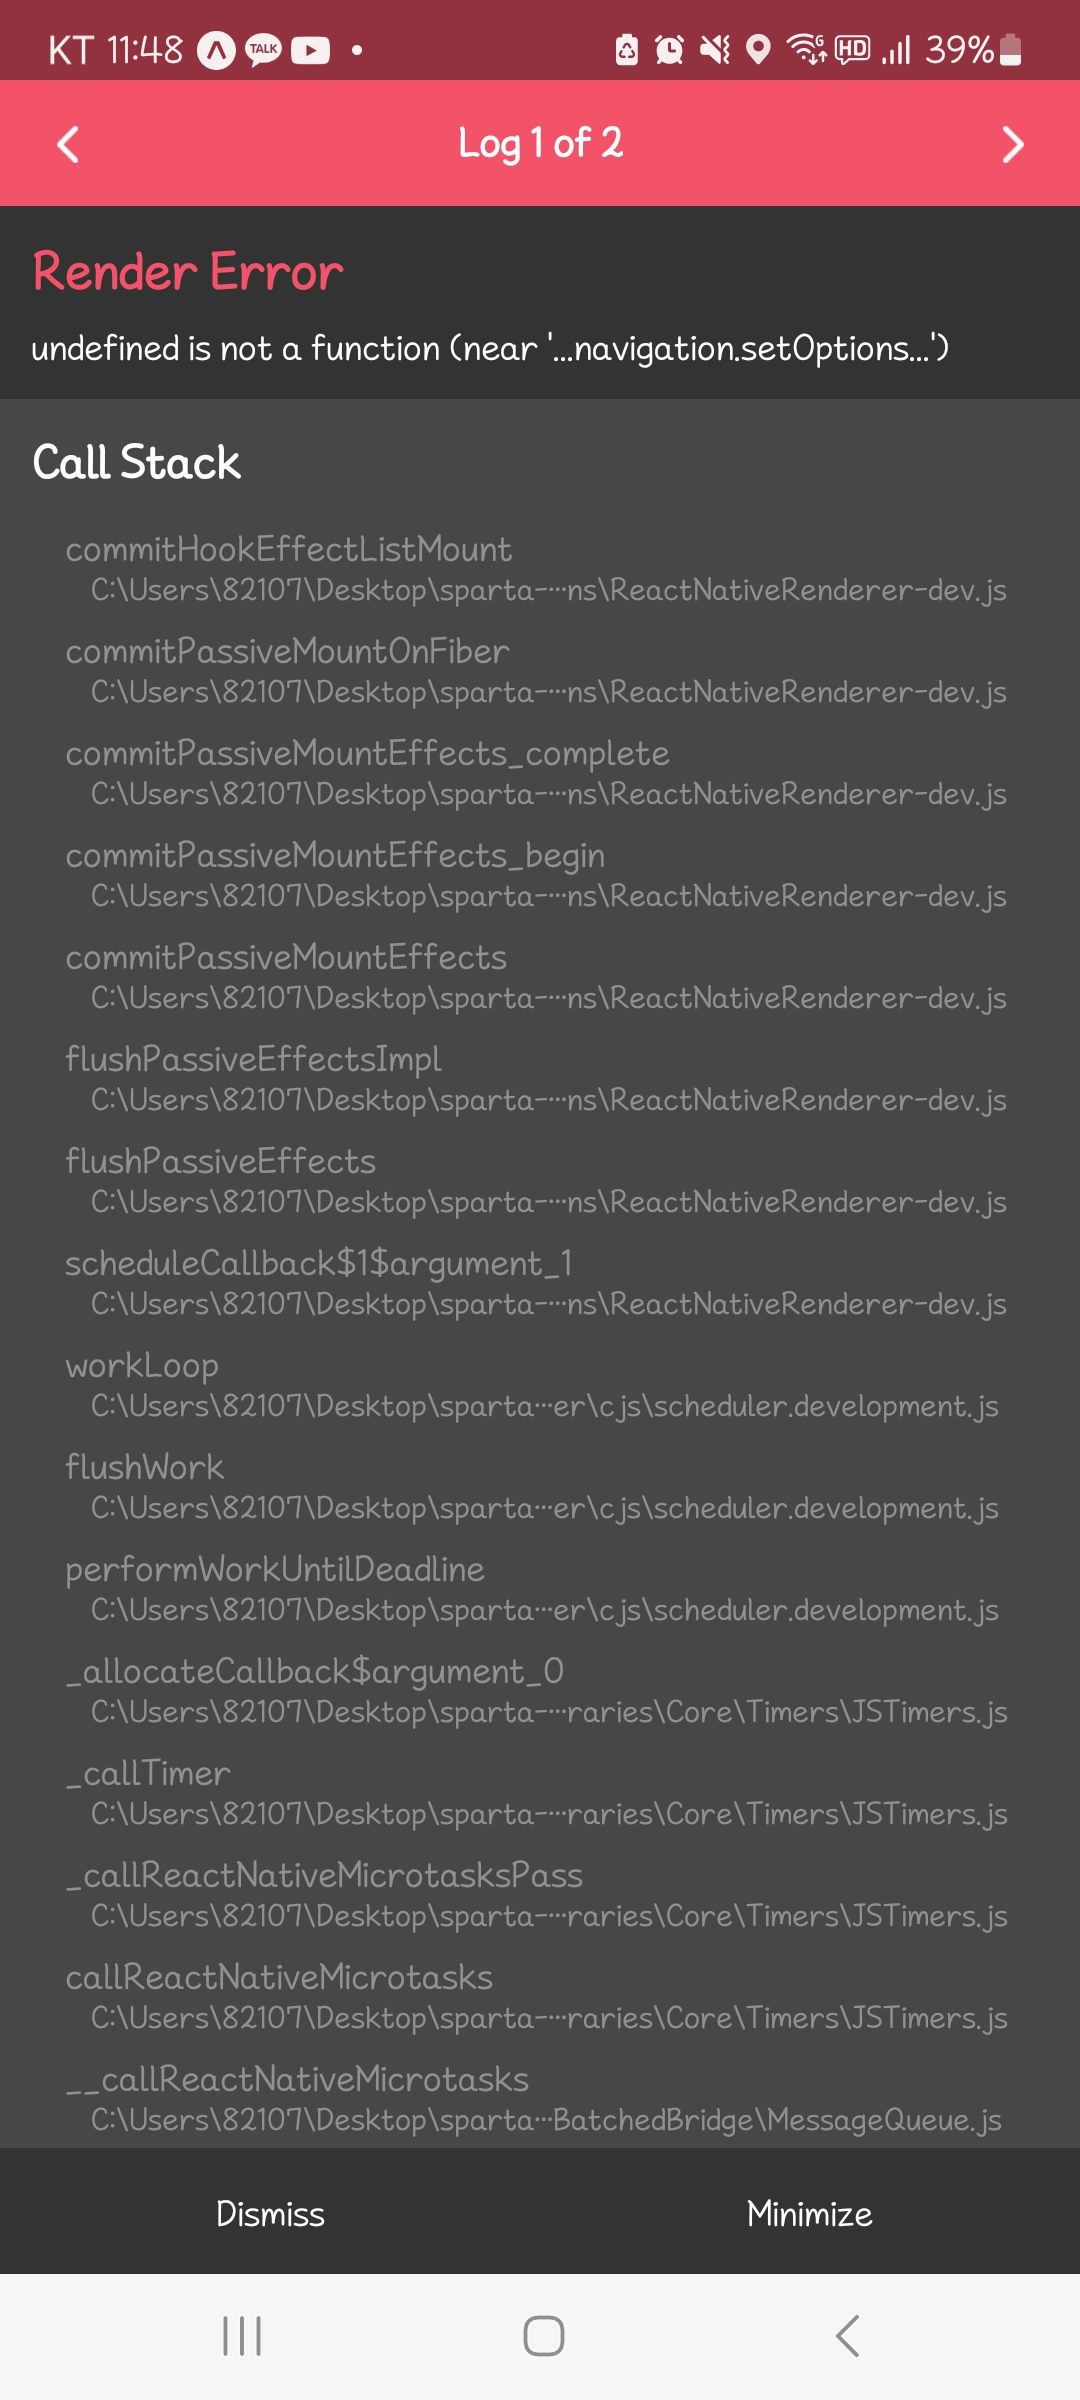
useEffect를 이용하였는데 오류가 발생합니다.
import React from 'react';
//설치한 스택 네비게이션 라이브러리를 가져옵니다
import { createStackNavigator } from '@react-navigation/stack';


//페이지로 만든 컴포넌트들을 불러옵니다
import DetailPage from '../pages/DetailPage';
import MainPage from '../pages/MainPage';
import AboutPage from '../pages/AboutPage';


//스택 네비게이션 라이브러리가 제공해주는 여러 기능이 담겨있는 객체를 사용합니다
//그래서 이렇게 항상 상단에 선언하고 시작하는게 규칙입니다!
const Stack = createStackNavigator();


const StackNavigator = () =>{
    return (


        //컴포넌트들을 페이지처럼 여기게끔 해주는 기능을 하는 네비게이터 태그를 선언합니다.
        //위에서 선언한 const Stack = createStackNavigator(); Stack 변수에 들어있는 태그를 꺼내 사용합니다.
        //Stack.Navigator 태그 내부엔 페이지(화면)를 스타일링 할 수 있는 다양한 옵션들이 담겨 있습니다.
        <Stack.Navigator
            screenOptions={{
                headerStyle: {
                    backgroundColor: "white",
                    borderBottomColor: "white",
                    shadowColor: "white",
                    height:100
                },
                //헤더의 텍스트를 왼쪾에 둘지 가운데에 둘지를 결정
                headerTitleAlign:'left',
                headerTintColor: "#000",
                headerBackTitleVisible: false
            }}

        >


            {/* 컴포넌트를 페이지로 만들어주는 엘리먼트에 끼워 넣습니다. 이 자체로 이제 페이지 기능을 합니다*/}
            <Stack.Screen name="MainPage" component={MainPage}/>
            <Stack.Screen name="DetailPage" component={DetailPage}/>
            <Stack.Screen name="AboutPage" component={AboutPage}/>
        </Stack.Navigator>
    )
}


export default StackNavigator;

// 스택네비게이터에 어바웃페이지를 집어넣었고
import React,{useEffect} from 'react'
import {StyleSheet, View,Text, Image, TouchableOpacity} from 'react-native'
import * as Linking from 'expo-linking';


export default function AboutPage(navigation,route){
    const link = () => {
        Linking.openURL("https://www.instagram.com/")
    }


    useEffect(()=>{
        navigation.setOptions({
            title:"소개 페이지",
            headerStyle: {
                backgroundColor: 'navy',
                shadowColor: "#1F266A",
            },
            headerTintColor: "#fff",
        })
    },[])


  return (
  <View style={styles.container}>
    <View style={styles.titleContainer}>
        <Text style={styles.title}>
            HI! 스파르타코딩 앱개발 반에 오신것을 환영합니다
        </Text>


    </View>
    <View style={styles.imageContainer}>
        <Image style={styles.Imagestyle} source={{uri:'https://firebasestorage.googleapis.com/v0/b/sparta-image.appspot.com/o/lecture%2FaboutImage.png?alt=media&token=13e1c4f6-b802-4975-9773-e305fc7475c4'}} />
        <Text style={styles.text1}> 많은 내용을 간결하게 담아내려 노력했습니다!</Text>
        <Text style={styles.text2}> 꼭 완주 하셔서 꼭 여러분것으로 만들어가시길 바랍니다</Text>
        <View style={styles.buttonContainer}>
            <TouchableOpacity >
            <Text style={styles.buttonText} onPress={()=>link()}>여러분의 인스타계정</Text>
            </TouchableOpacity>
        </View>
    </View>
  </View>)
}


const styles = StyleSheet.create({
    container: {
      //앱의 배경 색
      flex: 1,
      backgroundColor: 'navy',
    },
    titleContainer:{
        flex:1
    },
    imageContainer:{
        flex:4,
        backgroundColor:"#FFF",
        margin: 40,
        borderRadius: 30,
        justifyContent:"center",
        alignContent:"center"
    },
    title: {
      //폰트 사이즈
      fontSize: 40,
      //폰트 두께
      fontWeight: '800',
      //위 공간으로 부터 이격
      marginTop:50,
      //왼쪽 공간으로 부터 이격
      marginLeft:20,
      color:"#fff"
    },
    Imagestyle:{
        width:200,
        height:200,
        alignSelf:"center",
        borderRadius:30
    },
    text1:{
        margin:10,
        fontSize:26,
        fontWeight:"800",
        textAlign:"center"
    },
    text2:{
        marginTop:10,
        fontSize:20,
        fontWeight:"400",
        textAlign:"center"
    },
    buttonContainer:{
        width:150,
        height:50,
        borderRadius:15,
        backgroundColor:"orange",
        alignSelf:"center",
        marginTop:15
    },
    buttonText:{
        fontSize:15,
        color:"#fff",
        textAlign:"center",
        marginTop:13
    }


  });

//useEffect를 이용해서 색과 타이틀을 바꾸려고 했음.


댓글 알림
